Capstone Project · Group i26 · 2025–26
🐛 OKSIR Exuvia Counter
Automating the counting of coddling moth exuvia for BC's sterile insect release program. Faster, more accurate, and actually enjoyable to use.
The Big Picture
The Okanagan Apple Has an Enemy 🍎
The Okanagan apple is a premium, crisp and sweet delicacy. It's not just a fruit, but a symbol of identity and a proud export of the Okanagan valley. One of the biggest threats to that apple crop is a small, relentless pest: the Coddling Moth, which burrows into fruit and devastates farmer yields.
Rather than resorting to pesticides, the Okanagan Kootenay Sterile Insect Release (OKSIR) program takes a biological approach: they breed millions of sterile coddling moths and release them into orchards, where they mate with wild moths without producing offspring, suppressing wild populations by up to 90%. At their facility in Osoyoos, OKSIR produces 2 million moths every single day. That's nearly 20 moths released for each Kelowna resident, every single day.
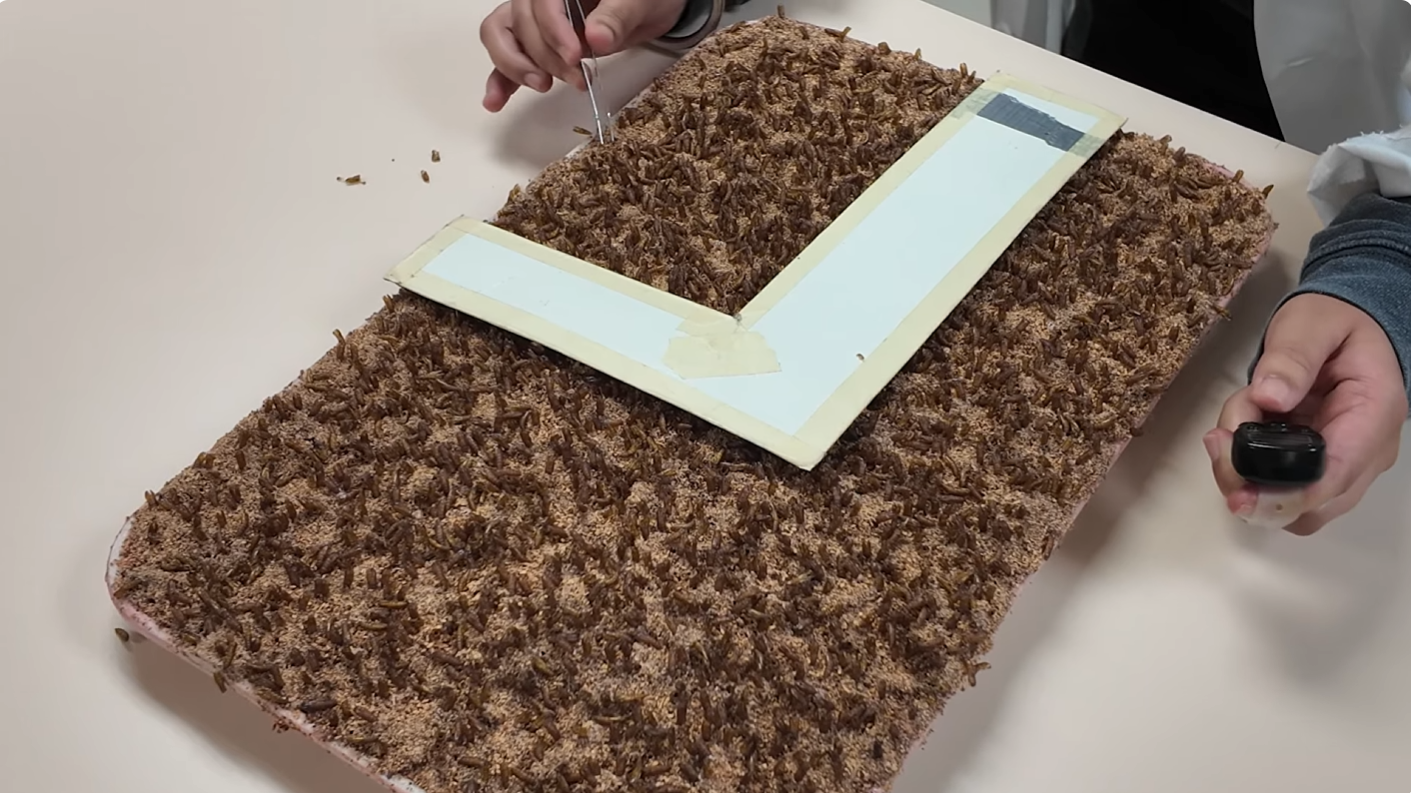
But how do you verify you've produced 2 million moths? One method is to count the exuvia, the shed exoskeleton shells larvae leave behind when they metamorphose. Staff at OKSIR manually count each tray, dividing it into four sections, counting one and multiplying by four to estimate the total. This takes time and is not super accurate as it is prone to human error. We've heard from staff on how it's just not a fun process. It requires a whole staff member dedicated to just counting exuvia during the summer. This is where we come in.
Design Requirements
What OKSIR Needed
- Accuracy & Speed: at minimum, outperform the manual 4-quadrant estimation method in both accuracy and time.
- Data Exportability: count data and batch statistics had to be easily accessible and exportable by OKSIR staff.
- User Friendliness: the solution had to be genuinely easy to use; not just functional, but something staff would actually want to pick up each day.
- Documentation: an open build procedure and user manual for long-term maintainability without ongoing engineering support.
The Journey
How We Got There
Our design went through three meaningful iterations, shaped by direct feedback from OKSIR, the physical constraints of the imaging environment, and the demands of the computer vision model itself.
The Simple Idea
The original concept was straightforward: use a phone or a simple camera setup to photograph trays and feed images into a counting algorithm. It seemed reasonable at first. But the moment we actually looked at exuvia under real-world conditions, the idea fell apart. Exuvia are small, semi-translucent insect shells, easily lost against a noisy tray background. Casual photography produced blurry, inconsistent images that a computer vision model simply couldn't reliably interpret. We needed a controlled imaging environment: consistent lighting, fixed geometry, known focal length.
Building the Box and Hitting a Wall
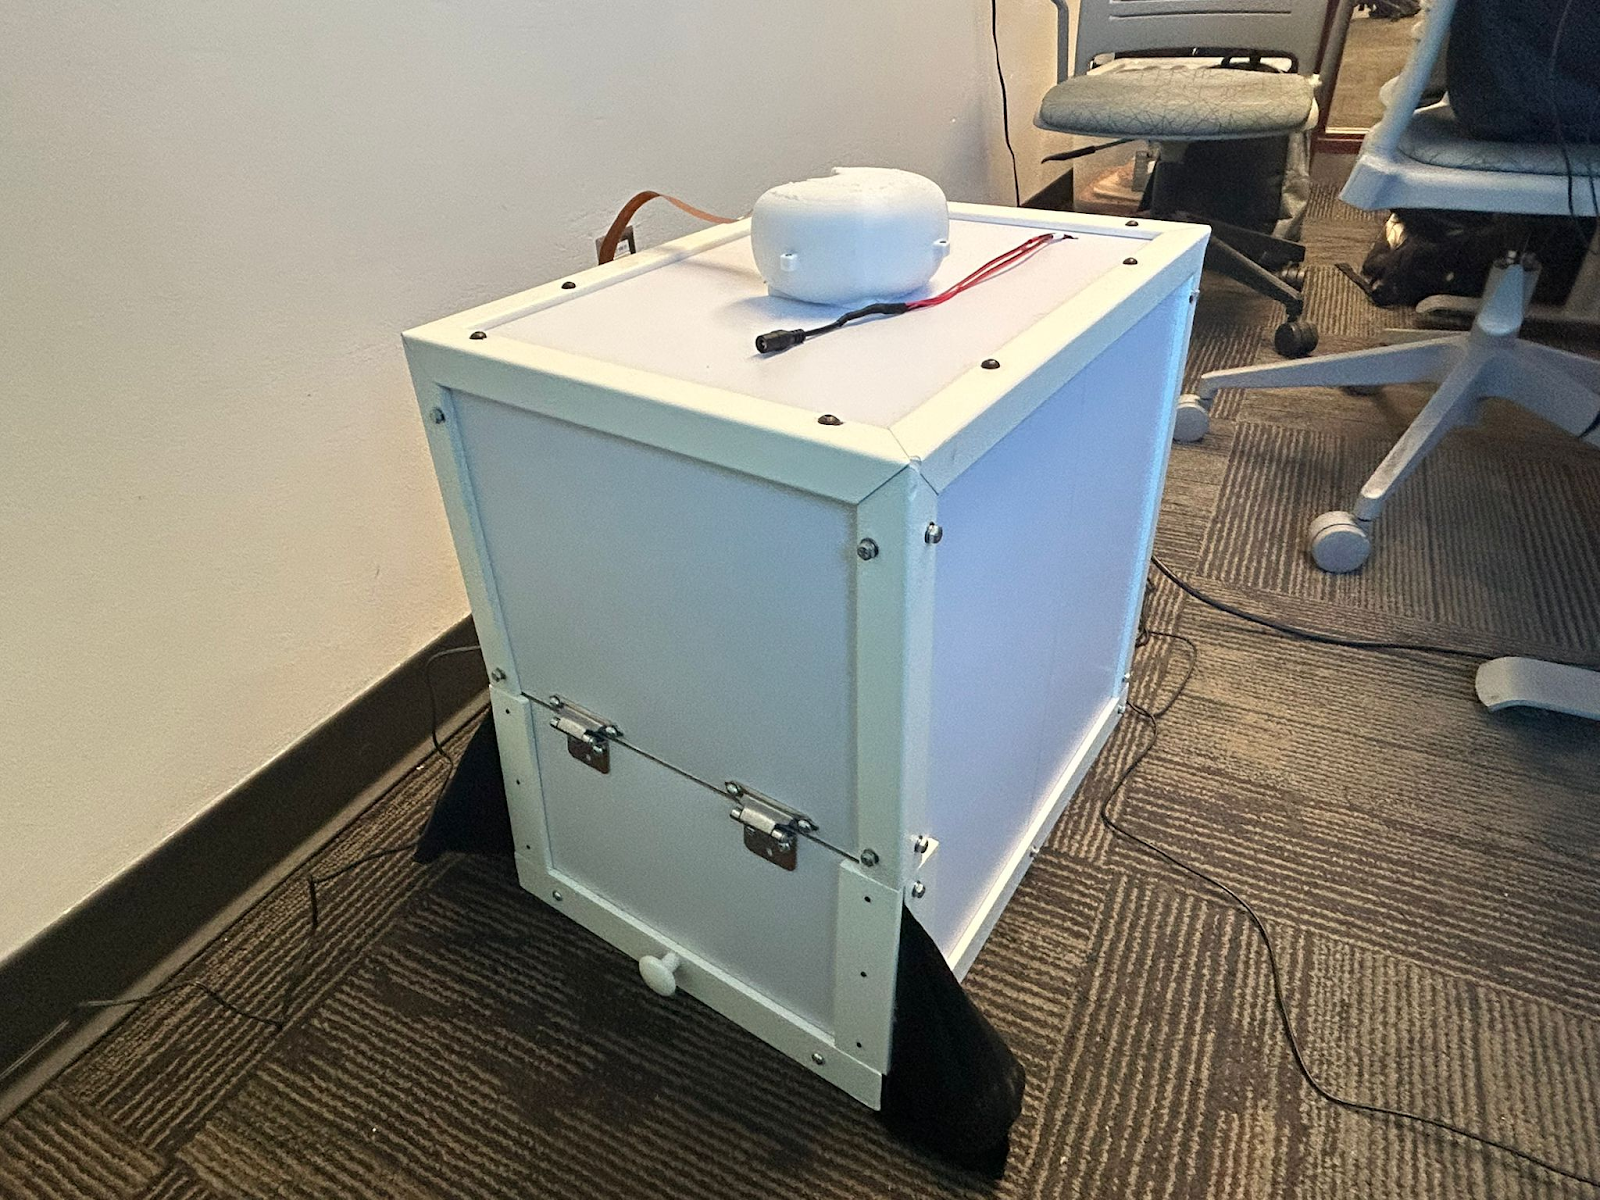
We designed and built an illuminated imaging enclosure: an aluminium-rail frame with vinyl-coated panels, lined internally with evenly distributed white and UV LEDs to create stable, diffuse lighting. The initial Raspberry Pi Camera Module was mounted underneath the top panel, fixed and pointing downward at the tray.
Two problems emerged quickly. First, the Pi camera module produced blurry images, inadequate for counting small objects at the required density. We upgraded to the Raspberry Pi HQ Camera paired with a 12-megapixel factory automation iris lens via C-mount, the kind of optics used in industrial machine vision, because 50% of good computer vision is simply good vision. The second problem was geometric: with the camera mounted flush under the top, it clipped the outer edges of the tray. Full trays weren't being imaged.
The Overhead Mount: Final Design
The fix required rethinking the camera position entirely. I cut an aperture in the top panel and designed a 3D-printed overhead mount that positions the lens above the box, looking down through the opening. This gave enough vertical clearance to image the full tray in a single frame. The mount also exposes the three manual adjustment rings on the FA iris lens (focus, iris, and zoom), making on-site calibration against a real tray practical and accessible rather than buried inside the enclosure.
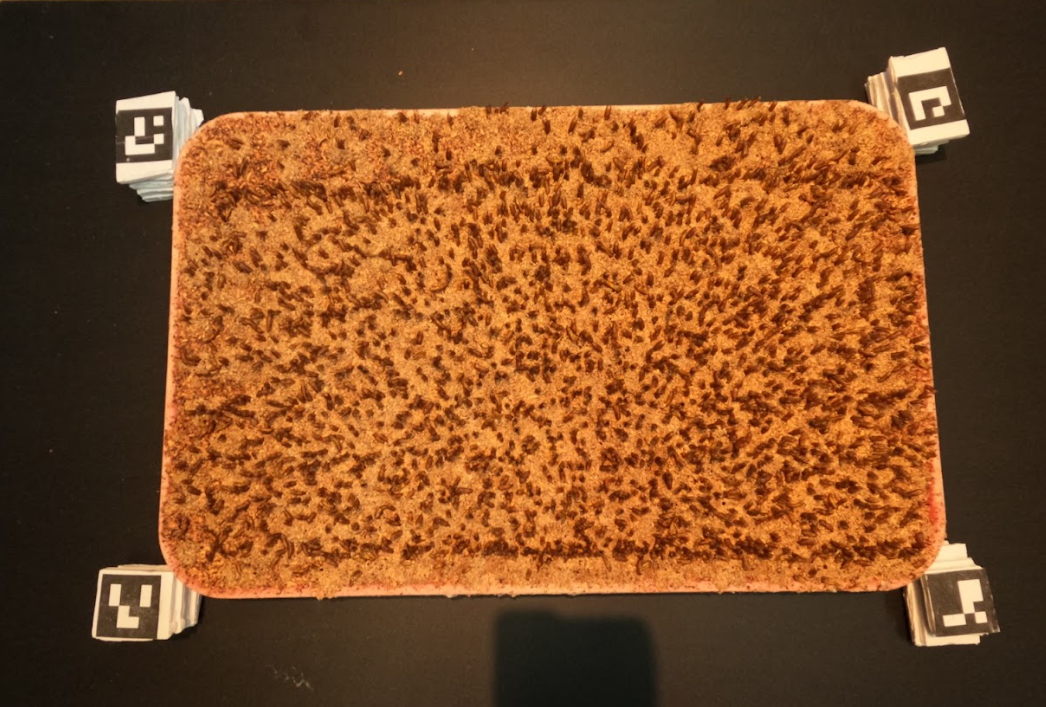
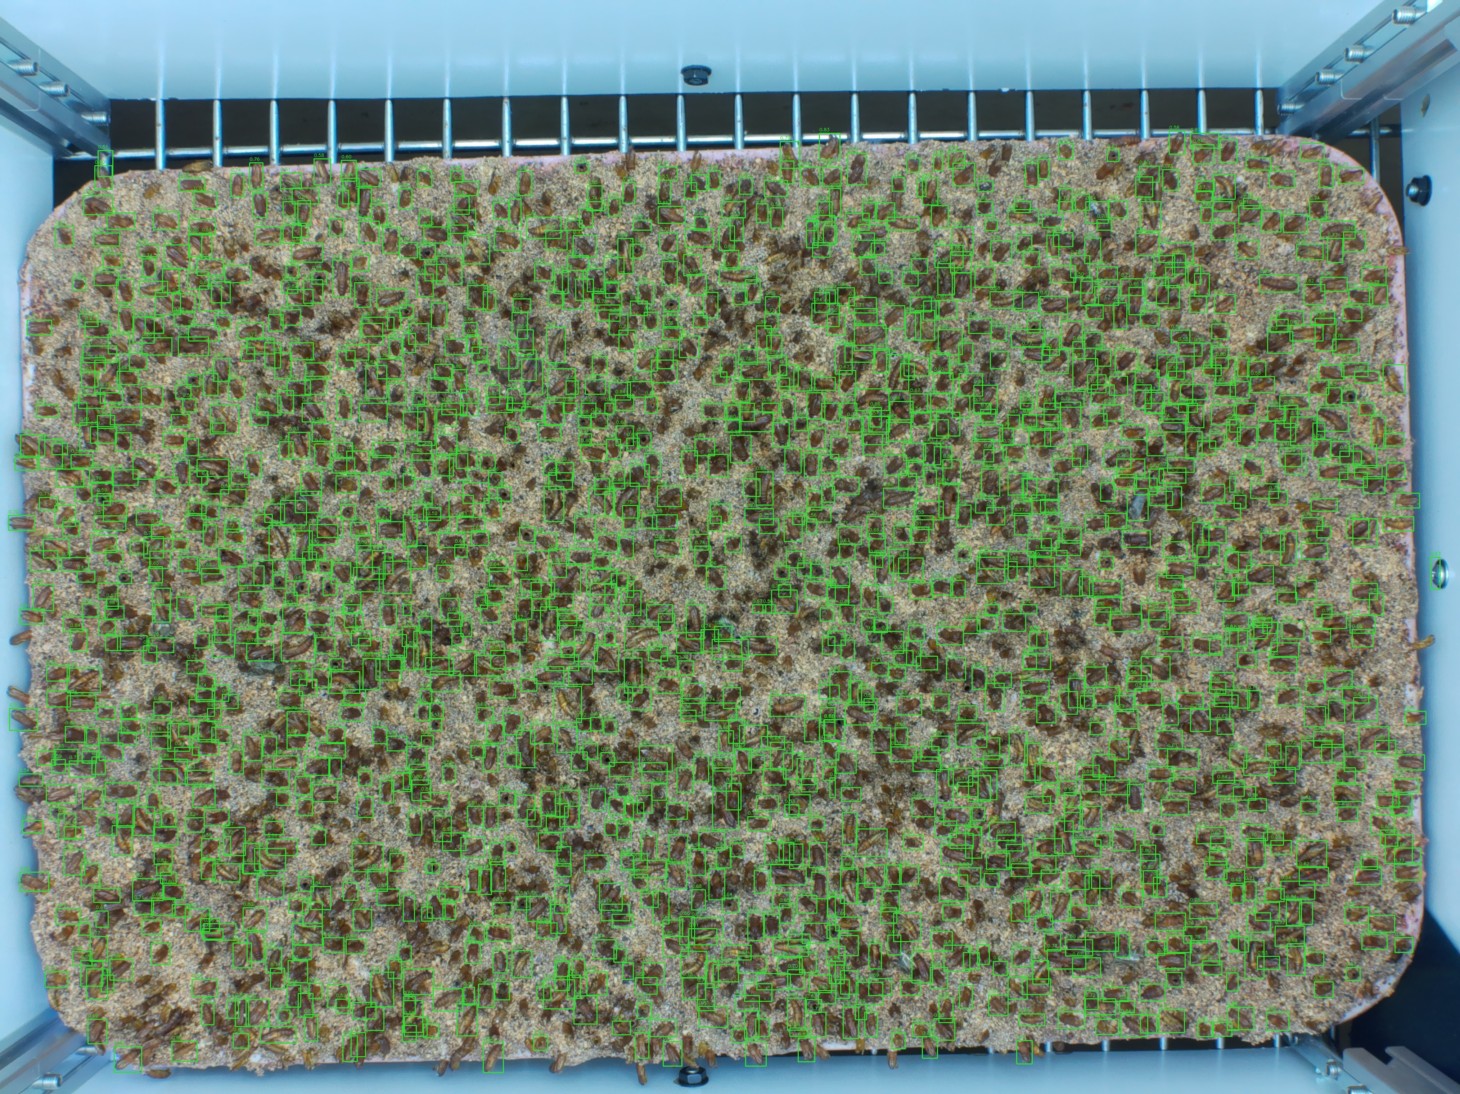
The resulting setup produces sharp, full-frame, consistently lit images of every tray in the same orientation, with known focus and controlled exposure. Exactly what a YOLO model needs to perform reliably across different batches and operators.
Technical Details
For the Engineers
The system has three core components operating in sequence: the imaging hardware, the compute platform, and the CV pipeline.
Imaging Hardware
- Raspberry Pi HQ Camera sensor (12.3 MP Sony IMX477)
- 12 MP FA iris lens, fixed focal length, C-mount to HQ Camera
- White + UV LED array inside aluminium enclosure for diffuse, consistent illumination
- Full-resolution stills via
rpicam-jpeg; live focus preview viarpicam-stilltimelapse stream
Compute Platform
- Raspberry Pi 5, headless on boot via
systemdservice - Accessible on-device or over LAN / Tailscale from any browser
- Local filesystem storage for captures, tiles, detections, and logs
- Excel-based logging via
pandas(data/exuvia_log.xlsx)
CV Pipeline
- Ultralytics YOLO26 detection model (trialled YOLO8, YOLO11, and YOLO26 — YOLO26 gave the best performance)
- 15,000+ human-labelled exuvia (supervised + semi-supervised training)
- Tiled inference for small-object recall; NMS for duplicate suppression
- mAP-50: 92% · Precision & Recall: >90%
My Contributions
What I Built
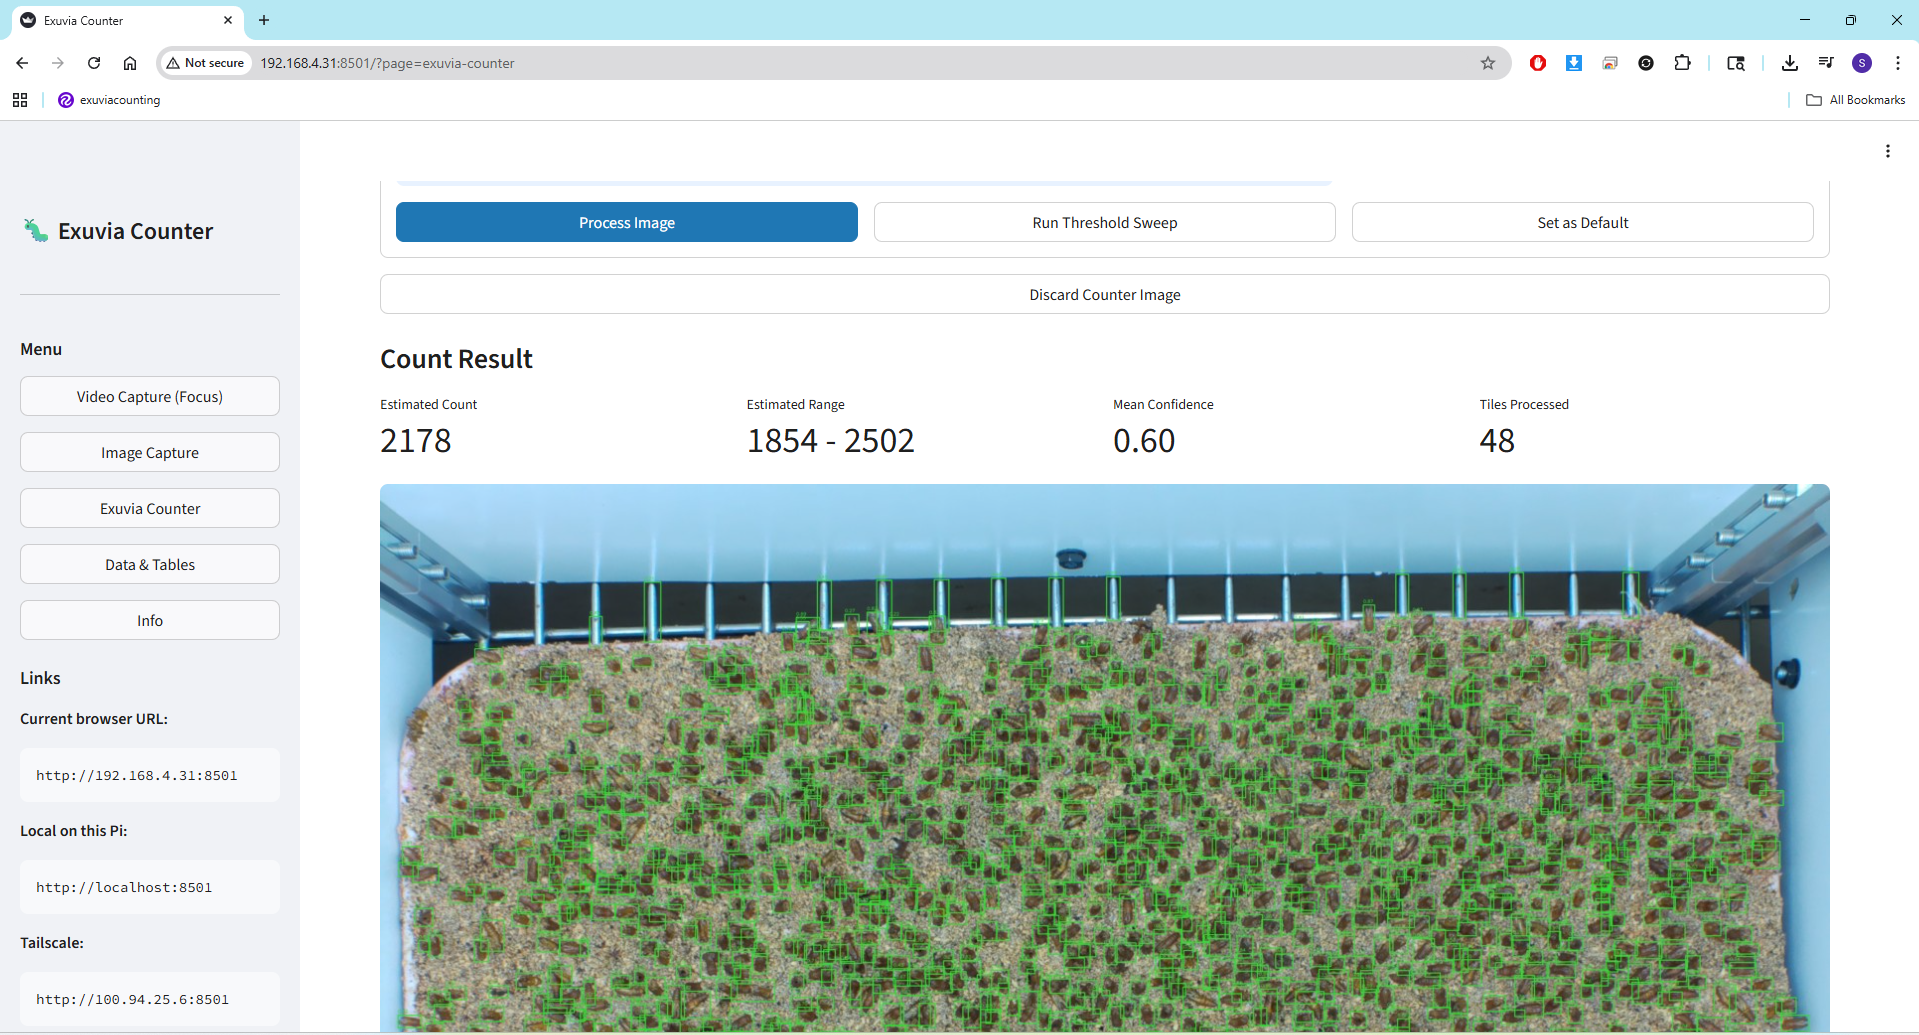
I served as the project lead and was directly responsible for the majority of the system's technical execution. Specifically: I designed and sourced the imaging setup (HQ Camera, FA lens, C-mount assembly), interfaced all hardware with the Raspberry Pi 5, and physically designed and manufactured the 3D-printed overhead camera mount. I built and curated the 15,000+ image training dataset through manual labelling, trained and tuned the YOLO26 detection model, and implemented the full inference pipeline with tiled detection and duplicate suppression. I also designed and built the Streamlit web application end-to-end, including the statistics suite, data export functionality, and user documentation, and conducted the final on-site calibration session with the client to ensure the system worked in their real operational environment.
Results
Outcomes
The system meets and exceeds all three of OKSIR's core requirements: it outperforms the manual method on both speed and accuracy, produces exportable batch statistics, and was designed from the outset to be approachable for staff with no technical background. The client received full documentation and a user manual for independent long-term operation.
Resources
Links & Code
Personal Reflection Looking Back, Moving Forward
On Design
What did you learn about the design process?
I learned that the problem defines the solution, not the other way around. When we started, the answer seemed obvious: take a photo, count. But the moment I actually looked at what we were imaging, small semi-translucent shells on a textured surface, everything changed. We needed a controlled environment, a fixed geometry, a proper lens. The project kept redirecting us back to the actual problem, and that is something I will carry into every project I take on.
On Engineering
What are the most important attributes of an engineer?
I think it's being human. Sure, this project would give me a grade at the end of the day and I could have treated it as just a task to get done. But going there, interacting with the client and hearing the lab tech changed that. It may not be world changing, but counting exuvia is a genuine issue they have, and they seemed so excited to see it being potentially solved. From that moment on, it was less an engineering job and more my duty to ensure I don't cut any corners and give them the best functioning exuvia counter I can.
On Responsibility
How has this experience shaped your understanding of the engineer's role in society?
Engineers have the power to shape the world. We can sharpen our skills and use them to hear people, understand their struggles, and think about how we can play a part in helping them out. Our client wasn't asking for a machine learning pipeline. They were asking to stop counting tiny shells by hand. That gap between what I could build and what they actually needed taught me what engineering responsibility looks like in practice.
On Growth
Strengths, growth areas, and a path forward
I think I listen to the client's problems and am very much a perspectivist. I won't stop until I feel like I have totally understood what they're looking for. The more open-ended the better: I will consult whatever I need to, build a prototype, and give it to them in a way they will actually be able to make use and sense out of. Where I need to grow is in formally communicating that work. Writing it up, presenting it persuasively. I plan to be more deliberate about documentation as I go, rather than treating it as something to do at the end.